Operating modes
- Adapt the cutting depth to the thickness of the workpiece. A space of less than the height of one full tooth should be visible under the workpiece.
Loosen the clamping lever (27). For a smaller cutting depth, pull the saw away from the base plate (12); for a larger cutting depth, push the saw towards the base plate (12). Set the required cutting depth on the scale. Retighten the clamping lever (27).
The viewing window for "CutControl" (9), which folds out to the front, allows the circular saw to be guided precisely along the cutting line that is applied to the workpiece. The "CutControl" viewing window (9) has markings for right-angled cuts and 45° cuts.
The 0° cut mark (30) indicates the position of the saw blade when making a right-angled cut. The 45° cut mark (29) indicates the position of the saw blade when making a 45° cut.
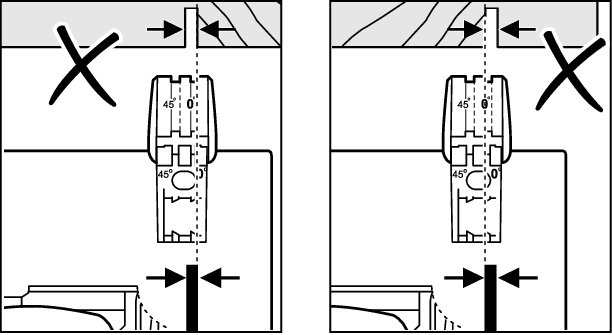
For a precise cut, place the circular saw against the workpiece as shown in the figure. We recommend making a test cut.